Oh, I've tried HGTV's Rate My Space and while that was very exciting in the beginning, it leaves you a little deflated....that is, once you get hit with the haters, rate robbers and space trolls that come out at night to down rate your rooms! Anyone who has posted on there knows what I'm talking about, right? You log off with a smile on your face...hooray! 4 stars! You log back on in the morning to a whopping.....2.3!...huh? You scroll through your comments, looking for a reason why...a constructive critique that you hope you can accommodate, something of the person who despises your home that much. Sometimes, you get lucky, aha! ...You get a name, a snide remark which you can reply to...but alas, only on your own page.....sigh....do those evil raters ever come back to read your well thought out retort to their critique?...sigh...No. Do those people know or care that you spent many late nights sewing (and ripping out seams) on those curtains? Or that you've spent hours inhaling toxic vapors refinishing the family hand-me-downs? Sadly...No...All your hard efforts have been diminished to a 2.3 Fair rating that wounds your heart...sigh...Don't get me wrong, there are many more well wishers on there but once you get those negative posts, all those gracious, well meaning comments fade to the background.
So with that experience behind me, I started searching for something else...I found Blogs! So many wonderful, heartfelt, funny, touching pages of triumphs, recipes and beautiful vignettes that can make a heart soar! I thought ..hey! This is like RMS but only better...You get to share your decorating ideas, a personal story or two , you don't get rated or judged and you get to make new friends! Sold!...er...Upload! :)
So with that lengthy introduction...here is my first post!
My First Real Upholstery Project
This was my most recent little project. I wanted to include a few photos and some how-to's in here to save you some trouble and flesh wounds. yes, I got a few... I had been wanting to make an ottoman for our home office or study as I like to call it...sounds more appealing that way. I was trying to think of a way to put one together with minimal use of power tools. A few days later, driving through our downtown, I spot this outside on the sidewalk of an antique-thrift store.

I park the car, run over and purchase this for $30! I load it up and place it in it's new home. Hmmm... a big white elephant! But I was not discouraged, for I had a vision. A few days later, as the older two kids were off at school and I had the whole day to mys....wait, forgot about our three year old...let me rephrase that..had the whole day based on my three year old's every whim, I decided to tackle my project. So I gather my gear: electric screwdriver, pliers, flathead screwdriver (to help pry up the old staples), fabric & button cover kit, super large upholstery needle & twine and some leftover decorative upholstery tacks.
I started by dismantling the ottoman. Flipping it over and removing the screws to separate the top & bottom pieces...not so bad...Don't forget to cut the old cords to remove the buttons.
Started ripping off the cording....okay....

Cut a new piece of fabric for the top...I casually stapled one staple on each side just to hold the fabric while I started my tufting...I wanted to be able to adjust the fabric.
Cover your buttons with some scraps...I swear the hardest part! And tuft your first button. Mine were easier since this had already been tufted...it had holes drilled in the bottom for the needle to come through - although I had to use pliers to pull it completely through. I used a small scrap of fabric to brace my needle against the plier teeth. Caution! Keep your face clear ( I even closed my eyes! lol!) while pulling really hard on the pliers to pull the needle through all the layers.

can you see the needle coming through the wood..? 
Okay, Pull Super TIGHT! pulling that needle all the way through. Remove the needle, tie a knot in the thread and staple the thread right in front of the knot ,down to the underside of the wood, staple, staple, staple along the string to keep this really tight. Can you see why there are no pictures for that step..? Gotta teach our 3 year old how to work the camera! :)
Three buttons down....four more to go! At this point I stop to work on the base....

I covered the base of the ottoman, cutting around the brackets that attaches the top.

Reused the old cording with new fabric, stapling that to the base of the ottoman.

At this point, I sort of stopped using the darn camera - sorry! But after you attach all your buttons (mine had 7 of them) wrap your top cushion like a present, pulling tautly and stapling, alternating sides...fold your corners in and staple everything underneath. Flip it over, lay the base on top of the cushion, reattach the screws and......

I re stained the feet a bit darker, attached some nail head trim with the 3 year old sitting on my lap, "helping" me hammer and I was finished!

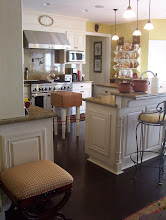
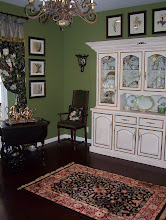
This is how it looks in the room.... Keep scrolling..... :)

 What do you think..? Not bad for $30 and the cost of the material, button kit, new upholstery needle & heavy twine, gas, bandaids, advil...hmmm... but really "honey, I saved a TON of money!" :)


9 comments:
Oh Laurie! You did great sweetie!! I clicked on your email as soon as I got it and went right over here :) The only thing that you need to do is play with the colors of the print because it took me a minute to find the place to make a comment. Other than that... you are golden! You can tell a great story too!! Very very nice :)
Now off you go to say hello to the other friends from RMS and your favorite bloggers so that you can get someone besides me to check ya out ;)
Welcome sweet friend!
xoxo,
rue :)
I love this so much! I am dieing to do this one. I just need to find an ottoman. I love the fabric choice too.
Kim
Thanks for posting the pictures. Helps me to decide if it's something I want to tackle.
Hi Laurie!!
I found your blog through Rue, whom I found thru Picket, who I found from a posting on RMS!! LOL! You won't believe this, but I keep a notebook of the rooms I love from RMS; I print them out and look at them for ideas. And guess what? Your room is one of them! I'm so glad I found your blog, I'll be a regular (may have to do one of my own!)
I see you're in No California - I lived in Alameda, Danville, and Antioch for 15 years before moving back down to So Ca. Where are you?
Talk soon,
Rhonda - Temecula, CA
temeculamom@yahoo.com
You did a wonderful job on this foot stool! AAA++++ You are so talented! Love your blog and I am putting you on my blog list!!!!BTW,
I lived in San Rafael, Antioch, Walnut Creek,and San Fransisco. Hope you are having better weather there then we are here in Washington, we got snowed on twice!
Hi Laurie, I've been upholstering with an old master for the last 1 1/2 years so I feel I can speak with a tad bit of authority, sooooooo...excellent job! Oh, I agree with every word written about RMS...it's so disillusioning. On a happier note your home is amazingly beautiful filled with character and charm with an enduring quality that will last for years. No doubt the world of blogging is a much more content place to be!
loved your home on rms and really glad i found your blog. enjoyable to read and lovvvveeee your decorating style:)
Hi! I recently found your blog. Your home is beautiful. I must say you did a fantastic job recovering the ottoman. I've been wanting to make a ottoman table for my family room. I was wondering how to do the tuffting. After reading this post I may give it a try! Can you tell me, are the holes about the size of the needle going through?
I'll be back to visit soon.
Joy
I love how you turned your antique find into something beautiful.
Post a Comment